WHAT’S A SNAPPER?
Snapper is an application, so it doesn’t clutter up your System or Library folder with a lot of extra junk that might de-stabilize your computer, which is always a potential problem with audio utilities. Because it’s an application, you have to run it to have its functions available, although you can set a preference to have it start up automatically. Once it’s active, you can just hide it in the background and let it do its work.
Snapper is copy protected via an activation key, which simultaneously registers your copy on Audioease’s website. It’s all quite painless, but note that you must have a copy of Snapper for each computer on which you want to use it.
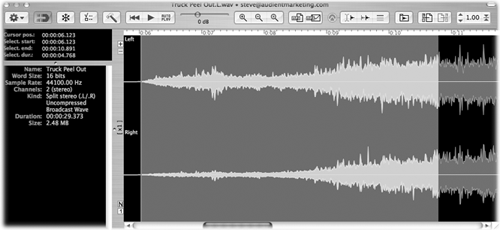
When you select any audio file in the Finder, Snapper brings up a resizable window and generates a waveform display within it, and a Toolbar above the waveform. This may take a moment if the file is long, but Snapper caches the waveform data so it appears instantly the next time. It also generates a marker per channel indicating where the maximum amplitude is located, and its value in dB.
Pressing the spacebar or clicking the Play/Pause button will start playing the file from the beginning. The “playhead” is represented by a green vertical line, and the waveform display moves to the right underneath the playhead. Pressing the spacebar again or clicking the Play/Pause button stops both playback and the moving display. Pressing Play again resumes from the last stop point. Pressing the Rewind button takes you back to the beginning. Toggling the AutoPlay button to on causes any file selected to begin playing automatically.
You can also double-click on any part of the waveform display, which will cause playback to begin from that point. A slider to the right of the transport controls sets the playback volume, and a button on the far right of the Toolbar controls playback speed, from half-speed to double-speed.

NAVIGATION
Clicking and dragging on the display creates a selection (there is no scrub function). Selections always play from the beginning, so there’s no pause function with a selection. The three zoom buttons with magnifying glass icons allow you to zoom in, out, and out to display the whole file, respectively. Snapper allows vertical zooming with the plus and minus buttons just to the left of the waveform display, and below that is a numeric that displays the level of vertical zoom. At the bottom is an “N” button (for Normalize View) which will zoom the vertical display to fill the screen, and a “1” button that will return the vertical scaling back to its regular level.
If the audio file is used in Pro Tools and as a result contains regions, then colored markers will define any Pro Tools regions, markers, or loops that exist within the audio file. While you can create a selection by clicking on one of these markers, you cannot edit them from within Snapper.
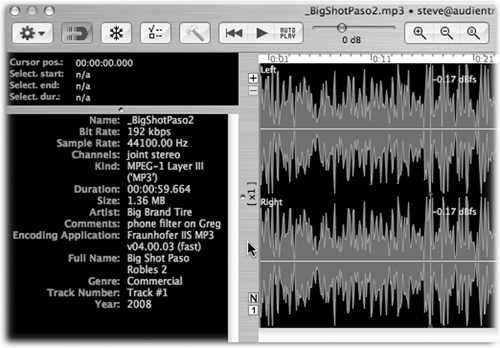
To the left of the waveform display is an information box whose lower half shows all the pertinent statistics for the currently selected audio file, including name, format, number of channels, sample rate, and that sort of thing. If the selected file is an mp3, then the info box will also display any ID3 tag information. If the file is a broadcast wave with annotations, then the annotations will appear. The upper half of the info box shows the current location of the cursor plus the start point, end point, and duration of any selection.

THE TOOLBAR
The Toolbar is home to the aforementioned transport and zoom buttons, but there’s quite a bit more there as well. On the left is a gear icon that triggers a drop-down menu of commands, most of which are duplicated in the icon bar, but is handy and lets you quickly see the key equivalents.
To the right of the gear is a magnet icon. When selected, the Snapper window will attach itself to the bottom of the folder window containing the selected audio file. Turning the magnet off lets the Snapper window float, and it will appear wherever it was last placed. Next on the right is the Freeze button. When activated, this button forces Snapper to remember and display the currently selected file only, perfect for when you want to fish around for other audio files while keeping Snapper focused on only one file. The next two buttons call up Preferences and the Toolbar Customization prefs, respectively.
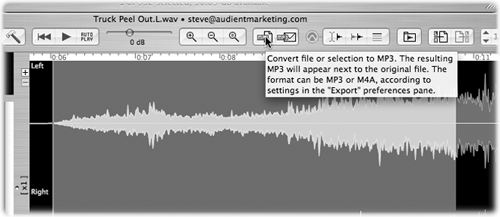
The right side of the Toolbar is where all the really cool stuff lives. Just right of the zoom buttons are two buttons with “MP3” on them. The first converts the current selection to an mp3 file, and places that file wherever you’ve told it to in preferences. This is one of the primary functions of Snapper, and it’s quick and easy. The conversion is done using the LAME MP3 engine, which you download and install separately using links provided within Snapper. The preference panel gives you access to the quality settings for the encoding, and you can also tell Snapper to use Apple’s AAC encoder instead of the LAME MP3 encoder. Keep in mind that Windows users cannot play AAC files without at least installing Apple’s Quicktime, so I keep mine set to mp3 format.
The next button performs the same conversion process, but puts the resulting file into a new email message using Apple’s Mail program, so it’s ready to be sent. Of course, if you use Entourage or web-based mail, this will be of little use to you, but if you do use Apple Mail (and I do) then you’ll like it.
The next three buttons will send the selected audio directly into Pro Tools. The leftmost button will spot it at the cursor on whichever track is selected in Pro Tools, and the center button will place the audio right next to the previously spotted audio, leaving a .10 second space between the regions. The rightmost button sends the selected audio to the region list, where it appears with the same name as the audio file open in Snapper. You can then spot the audio wherever you want it in Pro Tools.


