THINGS THAT ARE THE SAME
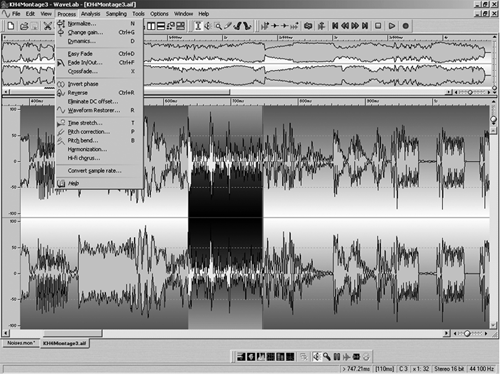
One of the things I’ve always liked about WaveLab is the Wave window, and Steinberg have kept it as-is in 5.0. This window consists of two parts, the lower main window where you can perform basic editing operations such as copying, cutting, pasting, moving, deleting and so on, while the upper window lets you look at the whole file which will show you entire one-hour programs if you like. You can zoom in or out of either window making it easy to zero in on a specific section while not losing track of where you are, and either window can be sized to suit your preferences and available screen real estate. It’s both fast and accurate.

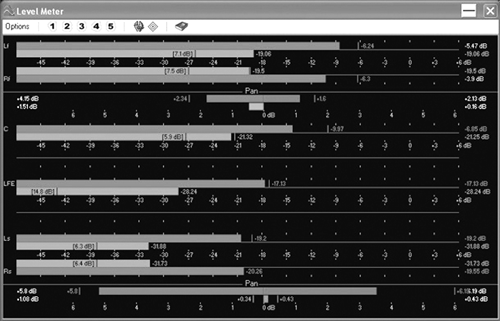
Also unchanged is the metering, which is both comprehensive and more accurate than any software I use, including Pro Tools. The metering in WaveLab 5.0 is definitely my fave, with six different types of meters. Each has its own separate window, and is accessible from a meter toolbar that can be placed anywhere on the screen. The level meters alone are worth the price of the program, with their ability to read peak and VU at the same time. They are totally scalable, and can be set up with preferences for ballistics, range, resolution, zones and color. You can even size and shape the meters to fit on your screen. Five presets allow you to create custom meter set-ups and recall them with a click of the mouse. There are even pan meters to show the difference in level between the left and right channels, although these only apply to stereo, duh.
Meters that I find especially useful include the Bit Meter that shows the resolution of the audio being monitored, by displaying how many bits are actually being used at any one time. It looks like an LED level meter, with the highest segment being “overscale” and the lowest numbered segment being 24 bits. If the lowest eight segments are lit, then you indeed have 24 bits. This is useful for determining the actual resolution of audio files, and to determine whether or not you need to use dithering after processing. You can have them analyze any selected section, and the meters display both the average values and instantaneous values over the selected range.
The 60-band Spectrum meter shows a continuous graphical representation of the frequency spectrum from about 20 Hz to 20 kHz in the shape of a bar graph, while the Spectrum analyzer uses FFT (Fast Fourier Transform) to display a continuous frequency graph, allowing for very precise and detailed real-time frequency analysis. While this may seem tweaky, frequency “bumps” can confuse MP3 encoders and cause them to toss out perfectly audible sound because a bump in some other sound briefly masked it. It’s another good way to check quality before you toss your work into the MP3 encoder.
 Also unchanged is the Master Section window, which consists of three sections. There’s an Effects pane, which allows you to add and manage up to eight effect processor/plug-ins in series, a Master Level pane that controls the final output level via linear faders, and a Dither pane lets you add dither (including UV-22) when mixing down to a lower bit resolution.
WaveLab 5 retains other features that are worth mentioning: batch processing for making wholesale changes to groups of files, a file database that is excellent for keeping track of project assets, very high quality dithering, and the aforementioned analysis options. These let me check my product for overs, spikes, clicks, and other digital garbage before I format and send it out. They also let me check that the 24-bit recording I’m making really is 24 bits wide.
I regularly end up creating music loops for promos, and WaveLab makes this simple. The program provides not only loop point editing and crossfade looping, but also a killer feature called the “Loop Tone Equalizer.” This can loop just about anything cleanly thanks to a “slice” mode that cuts the loop into multiple slices, then “averages out” the sound so that the end and beginning are seamless. If you’re working with a sustained tone at the loop point you’ll still have to crossfade it, but otherwise the Loop Tone Equalizer works wonders.
It’s also way cool for creating looping beds. You can take a four-bar loop, and use the Loop Tone Equalizer to cut it into four slices, so each bar now consists of a mix of the four bars. Isolate one of the bars, and you have a new, complex loop that includes elements of all four bars. Very handy for music promos where the part of the song you need quits too soon on you. Just create a new section using the above technique, and carry on with the promo.
The manual is longer than version 4 by about a hundred pages, but it’s still the complete reference guide it’s been in past. The index is still sparse, but searching the table of contents should provide you with any info you may need. It’s a good reference guide just in general.
