
 by Jerry Vigil
In a world full of digital workstations to choose from, it’s a pleasure to come across the Orban Audicy. Like its predecessor, the DSE-7000, the Audicy is a workstation designed for radio production first. Radio production people like you actually had a lot of input on the design. The result is a digital workstation with a ton of power and a user interface that enables even the least technically inclined person at your station to access that power.
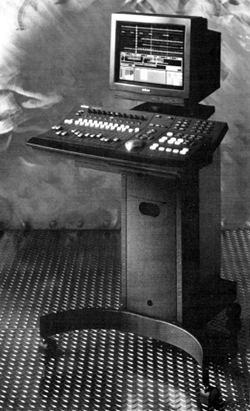
A typical Audicy system comes with the control panel, a monitor, the Pentium computer which houses the audio I/O cards and 2-gig drive, and the roll-around stand which houses all the components. An Iomega Jaz drive and a data DAT tape backup drive are optional, but highly recommended. The Audicy comes with balanced XLR analog stereo I/O and two auxiliary sends. The optional digital I/O card provides both S/PDIF and AES/EBU formats. The Audicy is a RAM-based 10-channel digital workstation with twenty-four tracks. Don’t get confused. The first ten “tracks” are assigned by default to the ten “channels.” Then there are fourteen additional “virtual” tracks for a total of twenty-four. The Map Tracks function is used to assign any of the fourteen additional tracks to any one of the ten channels, but only ten tracks, any ten, can be mixed at a time.
The extra tracks come in handy for a number of things. Most useful is the ability to record “update” tracks that can be moved to the virtual tracks until they are needed in the mix, thus freeing up all ten channels for the current mix. The virtual tracks are also great places to store backup copies of tracks you plan to do lots of editing on. If you ever need to recall the original, it’s there. Each of the twenty-four tracks can be named, and the name will appear at the left of the track display when the cursor is at the head of the production.
The Control Panel
The Audicy is a major upgrade of the DSE and comes with several new features, the most obvious being the new control panel. It is about six inches wider, a little deeper, and the back portion of the panel slopes upward to make the controls furthest away easier to see. Orban has exchanged the beige color of the DSE’s control panel for an attractive dark gray. The Audicy adds several more buttons, knobs, and a few more faders to the control panel and moves some of the editing and transport controls to more convenient locations.
The control panel now has thirteen faders, three more than the DSE. Two of the new ones are for channels 9 and 10, and the third is a fader for the submix (more on that later). A pair of INPUT monitor faders bring the total to thirteen.
Above the ten channel/track faders are white PLAY and RECORD buttons for each track. The RECORD buttons select one or two tracks for recording and arm tracks for certain editing functions. The PLAY buttons also select tracks for editing as well as playback. Above these buttons is a row of blue SELECT buttons with red LEDs in the center of each. These are just below a row of ten PARAMETER CONTROL pots. These two sets of controls were not on the DSE and are a wonderful addition to the control panel. They access the unit’s effects patch bay and enable quick parameter adjustment without having to move the faders as was necessary on the DSE. The SELECT button’s red LED lights to indicate that a track has an active effects patch.
An A/B button replaces the DSE’s SOLO button. It retains the original function and adds a new feature. When pressed, track PLAY and RECORD buttons can be set to a different configuration, ideal for putting a single track in “solo” mode without affecting the other tracks. This is most helpful when editing tracks. Use the B mode to select tracks for editing. When editing is done, select the A mode to return the tracks to the original play/record status. The new Auto A/B function automatically switches to the “B” setup when the record mode is entered. This enables the Audicy to provide “auto-monitor switching” when doing punch-ins, allowing you to hear playback of a voice track, for example, until the punch-in, at which point, the Audicy switches to the “B” setup where you can have the playback for that track turned off, leaving only the input signal, and any other tracks such as a music bed, in your headphones.
To the right of the mixer section is the large silver scrub wheel that features a user adjustable Speed Limit and Gear Ratio. Because all audio is in RAM, there is absolutely no delay when “rocking the reels.” The scrub is as close as it gets to the real thing, and this makes locating very precise edit points very easy, which is a good thing, because the Audicy does not provide high resolution waveform editing with zoom in/out functions.
Above the scrub wheel are four large arrow buttons for navigating through the on-screen menus. Above these are the PAGE UP and PAGE DOWN buttons also used for screen navigation. At the top of this section of the panel are five smaller, green buttons. The HELP and ESC buttons are carry-overs from the DSE, but the MIXER and EDITOR buttons are new. They allow quick access to the Audicy’s two main screens. The fifth button is unlabeled and obviously awaits future software upgrades. There are two more unlabeled buttons at the top right of the panel, giving the Audicy room to grow. And if that’s not enough, the addition of CTRL and ALT buttons together with the original SHIFT button leave plenty of unused keystrokes available.
There are several more buttons on the right side of the Audicy’s panel that are not found on the DSE’s panel. Again, many of these are buttons that bring to the control panel functions that require menu selection on the DSE. These include INPUT for toggling between digital and analog inputs, SPLICE for setting the edit “splice angle,” and BOUNCE which toggles between the bounce record mode (for mixing up to ten tracks down to two) and regular record mode. A numeric keypad was also brought to the control panel for easier input of numeric data.
Apparently, the DSE found its way into enough A/V production houses that Orban decided to add a healthy dose of SMPTE functions to the Audicy as an option. OFFSET and CHASE buttons are new to the panel. The Audicy supports 24fps and 25fps dropframe, 29.97 dropframe or non-dropframe, and 30fps formats. Audicy can chase incoming time code or generate it internally. A SMPTE Time Code Setup screen provides access to several SMPTE parameters.
The right side of the panel closest to the user is where the transport, editing, and locate controls are found. Much time went into determining the ideal layout of the control panel, and the homework paid off. After a while, performing multiple keystroke functions becomes a quick, subconscious effort as your hand moves across the panel. Since the transport controls are the most used, they are placed nearest the user at the bottom of the panel. You get the usual RECORD, PLAY, STOP, FFWD, and REW. The CUE button toggles between the two “tape” ballistics modes. When it’s flashing, the FFWD and REW buttons jump through the audio in :20 segments. When CUE is not flashing, the FFWD and REW buttons have normal “tape” type ballistics utilizing Orban’s unique “tape rewind/fast forward” audio effect.
The SOURCE IN, SOURCE OUT, DEST IN, and DEST OUT buttons mark edit points. Press SOURCE AUDIT to audition audio at the SOURCE IN point. Likewise with the DEST AUDIT button. If you want to loop something very quickly, mark the Source In and Source Out points and press PLAY and SOURCE AUDIT simultaneously. The loop plays until you hit STOP. The DEST IN/OUT buttons are also used to set in/out points for the Auto Punch-in/out function. In fact, there are several multiple keystroke functions on the Audicy. They’re the kinds of shortcuts and tricks one learns over time.
The ENTER and UNDO buttons are part of the group of editing buttons. ENTER executes a function and UNDO undoes the last edit or recording. There’s only one level of undo, but regular use of the Copy function on important tracks or the Copy Self function on entire projects will keep you out of trouble.
There are nine buttons dedicated to the Audicy’s locate functions. SET sets locate points (up to 24) which are numbered on the screen and can also be labeled. The <-LOCATE and LOCATE-> buttons move the transport quickly from locate point to locate point. The GOTO button brings up the Go To Locate Point screen that lists existing markers and lets you select the locate point to go to. HEAD takes the transport to the beginning of the project. TAIL locates to the end of the project. LOCATE 1 and LOCATE 2 are two dedicated buttons for easy access to the first two locate points set. The LAST RECORD button locates to the point where the last recording began--there’s no quicker way to setup for retakes.
At the top of the “cool” list of new features is the way Orban took the clunky computer keyboard completely out of the equation...almost. The keyboard has been replaced with a much smaller laptop-size keyboard snugly fit into a small drawer which hides nicely under the control panel at the right front. If you didn’t know it was there, you’d think they forgot to ship the keyboard. The keyboard is used only for text entry--naming projects, editing note files, etc..
The Project Controller Screen
The screens on the Audicy are another major improvement, not only from a functional point of view, but better graphics make them much nicer to look at. With the addition of two more tracks, things had to be made a little smaller, so the optional 17-inch monitor is highly recommended.
The system boots to the Project Controller screen which offers four pull-down menus. The Production Manager menu provides selections for creating, opening, and managing “productions.” Two types of productions can be created using the Make New and Make Temp selections. Make New opens a production on the hard disk, and all work is “shadowed” to the drive as a backup. Make Temp opens a temporary production that is not shadowed to the drive. All work remains in RAM, and this is the only case where a power failure most certainly destroys any work you’ve done. Speaking of power failures, if you don’t use an uninterruptable power supply (UPS) on your digital workstation, get one. You’ll never lose work due to power failure.
Once projects are stored on the drive, they can be recalled using the Edit Old and Edit Temp selections. Edit Old opens the project and writes any changes to it. Edit Temp opens the project, allows making changes, but does not write the changes to the original project.
The Copy selection copies any project on the drive to another location on the drive or to the external, optional Jaz drive. All track, mixer, and effect settings are copied. Use the Rename function to rename existing projects. The Sort function sorts projects by name, creation date, date last edited, disk usage, and more. Use the Erase function to permanently remove projects from the drive. The Backup and Restore selections permit storage and retrieval of projects to data DAT. (If the Jaz drive is installed, using the Copy function serves as a backup to the faster Jaz discs.)
The Audicy offers a second audio storage area called the Library. Here you can store stereo or mono sound files. The Project Controller screen offers several selections under the Library Manager pull-down menu including Copy, Rename, Sort, Backup, and Erase. This is a good place to keep often used sounds, music beds, and voice tracks such as your station voice saying the call letters, etc.. Library sounds are then easily placed in a production using the Library Dub In/Over function.
Under the System Utilities menu on the Project Controller screen, there are two disk maintenance functions. Check Up scans the disk for errors, and Optimize runs the Norton Speed Disk program which degfrags the disk files. System defaults are set here as well as system date and time. Windows users are familiar with the Print Manager; the Audicy has one, too. The Audicy’s print function is used for printing lists of productions and library sounds on a drive as well as production “note” files.
Speaking of production note files, this is something the DSE already had, but was greatly improved on the Audicy. Each production has a note file attached to it where information can be attached to the production using a simple text editor. With the DSE, accessing this text editor requires leaving the production completely then loading the note file for that production. With the Audicy, you can access the note file from within a production, making this handy feature much more usable.
The last pull-down menu on the Job Controller screen is the Information Center which provides information about the hardware and software configuration, disk usage, and backup DAT usage.

The Editor and Mixer Screens
Once a production is created or an old one opened, there are two main screens you’ll work with, the Editor screen and the Mixer screen. No matter which screen is active, the bottom half of the screen is always the same. A horizontal “overview” display shows all audio on the ten tracks. Several time displays indicate edit points, locate points, and more. There’s a Status Bar with the cursor time displayed in large, bright green numbers at the center. Other indicators on the Status Bar show which input is selected (Analog, S/PDIF, or AES/EBU), the current “splice angle,” current PARAMETER CONTROL knob status, SMPTE information, and more. Four sets of meters show input levels, auxiliary send levels, submix levels, and main output levels. At the bottom center of this screen is a set of pull-down menus where various mixer, editing, and system functions are selected.
Other indicators on this bottom half display include a Memory gauge which shows the amount of recording time available. This is recording time in RAM. Standard systems come with 17.4 track minutes and are expandable to 70 track minutes. These figures are based on 32kHz sampling. There’s a message window that keeps you constantly posted on the machine’s status as you work. Another window shows the current production name and sample rate (32kHz or 44.1kHz). The PARAMETER CONTROL knob “update” window is very useful. Whenever a PARAMETER CONTROL knob is rotated, this window shows the channel number, the parameter assigned to the knob, and the current setting. A glance at this window lets you know what parameter you’ll adjust if you touch the knob.
When in the Editor screen mode, the top half of the display offers an amplitude waveform view of audio on the ten channels. As mentioned, there are no waveform zoom functions, but the RAM scrub, as good as it is, makes locating edit points with your ears very accurate. (Isn’t this the way most of us learned to locate edit points to begin with?)
Once edit points are marked using the SOURCE IN/OUT and DEST IN/OUT buttons, the edit function can be selected from the Editor pull-down menu. Leader simulates adding leader tape to a marked area, moving audio on the track further down the track. Cut removes audio from the selected area and brings the two ends together. Erase removes audio without “splicing” the ends together. Copy In and Copy Over copy audio from one area or track to another. Copy In moves any audio at the destination point further down the track(s). Copy Over writes over any existing audio at the destination point. The Copy function also serves to place audio in the Audicy’s “clipboard” by using the SHIFT button with the SOURCE IN and SOURCE OUT buttons to recall the clipboard audio for multiple pastes.
The Copy Self function copies up to all ten tracks to a new location in the same production. This is another function new to the Audicy and is very handy. Say you have a complex promo taking up all ten tracks. You need to do an update that’s going to require editing several of the tracks, but you don’t want to destroy the original. Simply mark Source In/Out points covering all ten tracks, then mark a Destination In point anywhere after the original tracks. Press the ENTER key and all ten tracks are instantly copied, using up no additional RAM, and are ready for editing.
Other editing functions include Move In and Move Over which remove marked audio from one location and place it elsewhere. Swap Track swaps all audio on a track with that of another track. Swap Range swaps marked regions of audio. Loop In and Loop Over enable quick looping of marked areas. Very short segments can be marked to create that famous stutter effect without using a sampler/keyboard. The Loop Self function, like Copy Self, lets you loop all ten tracks. Let’s say you have a series of IDs to cut, one for each air personality. You use up all ten tracks with effects, music, etc., and one track has the jock’s name. If you have seven jocks, execute the Loop Self function and select seven loops (up to ten can be selected). Instantly, you have seven copies of your entire production, waiting for you to change just that one voice track for each jock. The Loop Self and Copy Self functions are both great additions to the original DSE software.
Under the Studio pull-down menu are a few more goodies such as Time Fit. The Audicy’s time compression/expansion algorithm is very clean and very fast--one of the best out there. Shrinking a sixty-second voice track by ten percent took only nine seconds, and the Audicy’s time compression/expansion algorithm is virtually glitch-free when kept within reasonable compression/expansion percentages. The Pitch In/Over function alters the pitch of marked areas without changing the tempo. The Vari In/Over function takes a marked area and alters its playback speed by up to +/-25%. This is handy if you want to apply vari-speed to only a segment of audio in a production rather than the whole production (using the Audicy’s real-time Vari-Speed function: SHIFT+PLAY). The Flip In/Over function takes the marked area and reverses the audio.
Most of your work time will be spent in the Editor screen, but you’ll make frequent visits to the Mixer screens, too. There are two mixer screens to toggle between, each taking up the top half of the display. The simpler screen shows all faders with current gain positions and pan pots. Indicators at the top show which tracks have effects patched into them using the Audicy’s internal digital effects (more on those later). The second, more complex mixer screen removes the fader graphics to add room for the submix pan and gain pots and the pan and gain pots for the two auxiliary sends.
The Audicy’s sub-mixer is very handy. All ten channels can be applied to a submix which has its own fader on the control panel. This is mixed with the stereo master out. There are many uses for the submix. One I took advantage of several times is the ability to take several tracks out of the main mix and send them through the sub-mixer where I can apply a single effect to all the tracks using the sub-mixer’s “patch” point.
Built-in Effects
Built-in effects came to the Orban workstations with the introduction of the DSE-7000FX. The Audicy makes using these effects much easier with the SELECT buttons and PARAMETER CONTROL knobs on the control panel. Pick a track to apply an effect to, press that track’s SELECT button, and the Audicy’s Effects screen pops up. Choose from Orban Equalizer, Optimod Compressor, Orban Mini Reverb, Lexicon Small Space Reverb, Lexicon Large Space Reverb, and +12dB gain (for quickly adding 12dB to any track). The equalizer, compressor, and reverb programs come with several factory presets which can be modified and saved to a user “Custom” preset location which is stored with the production, but the custom preset cannot be recalled into another production. It has to be recreated from scratch. As the effect names suggest, the compressor and reverb programs utilize Optimod and Lexicon algorithms which deliver high quality effects. The compressor parameters simulate those found on the Optimod transmitter audio processor and take some getting used to, but the results are excellent.
When an effect is selected, the row of ten PARAMETER CONTROL knobs are duplicated on the screen and indicate what each knob controls. Several of the effects have multiple pages of parameters accessed with the PAGE UP and PAGE DOWN buttons on the controller. The effects on the Audicy are enough to eliminate using external compressors, EQ, and reverb/delay boxes, but you’ll still need the outboard gear for flanges, multichannel pitch shifting, distortion, and other sporadically used effects.
Summary
Finding things to do with the extra two channels was not a problem. Before I knew it, I was using stereo sound effects where I would otherwise have used a mono version or not bothered with the effect at all. Personally, I still think twelve is the magic number of tracks for radio production, but ten is a big step in the right direction. Of course, one can always mix down ten tracks to two and free up eight more, but you must record the mix over two of the other tracks, thus somewhat destroying your original tracks. Then again, you could get into the habit of using the Copy Self function before you do a mixdown to copy the entire production further down the tracks. Then use that version for the bounce while keeping the original tracks intact.
I was also thrilled to see the Iomega Jaz drive as an option. Now there is an infinite amount of storage space available using removable 1-gig Jaz discs. Each producer can have his/her own disc(s) at around $100 per disc. This can help keep the 2-gig hard drive relatively free for productions that will be used by more than one person or for storing Library sounds that everyone can access. And the Jaz serves as a much faster backup than the data DAT system, though the DAT system is ideal for long term archiving.
Practically all other digital workstations are hard disk-based. Being RAM-based gives the Audicy lots of pluses with a few sacrifices. Because all editing and processing of the audio is done in RAM, things happen very quickly. Cut and paste edits occur instantaneously. Effects are real-time. The scrub function has zero delay and is therefore as close to actually rocking reels as it gets. The drawbacks to RAM based systems are 1) the size of the production is limited by the amount of RAM in the system, 2) the additional RAM is more expensive than hard disk space, and 3) while most disk-based systems load projects very quickly if not instantly, the Audicy takes anywhere from a few seconds to a couple of minutes to load productions into RAM, depending upon the size of the production. If you’re only doing spots and promos, you’ll find the standard 17.4 minutes of RAM plenty, and most productions will load in about 30 seconds or so.
Not enough can be said for the ongoing effort Orban makes to create a workstation designed for the fast-paced environment of the radio production studio. As digital worked its way into radio, the common cry from the trenches was that some systems were too hard for some staff members to get the hang of. It wasn’t easy for many jocks to make the transition from broadcast consoles to computers and mouse-driven menus. Orban has done a great job of taking the computer out of this system, and that is a comfort to those on staff who still haven’t found their computer comfort zone but still need to do production. And on screen help with the touch of the HELP button does wonders to keep the manual out of sight. At the same time, there are enough functions and features in the Audicy that the “power” user can crank out complex productions without feeling as though they are limited by the system’s effort to make it easy for others to use. There are several functions and shortcuts that aren’t staring the average user in the face. But they’re there, on a help screen or in the manual, waiting for the user that wants to go to the next level.
Have you heard stories about how some manufacturers will let their DAWs go completely into extinction when their “new model” comes out? No so with Orban. Current DSE-7000 users will be happy to know that their system can be upgraded to the Audicy by replacing the controller, software, and some hardware. Prices will vary depending upon how old your system is. Prices are due to be announced any day, and shipping of upgrades is tentatively slated for mid-October. Furthermore, the Audicy and DSE are compatible with each other. DSE productions and library sounds will load on the Audicy and vice versa; however, you will lose tracks beyond track 8 when loading an Audicy production into a DSE. Still, Orban deserves a pat on the back for not deserting their DSE users.
The Audicy is not cheap. For $19,950 you get the basic system which consists of 17.4 minutes of recording time, a 2-gig internal drive, and 14-inch monitor. Add a little more for the Jaz drive, tape backup, 17-inch monitor, and extra RAM if desired. It’s certainly not like going to the boss and asking for $300 for a new multitrack software program you found in the Internet. The Audicy is an investment, but you get a product that has already proven itself via the DSE. It comes from a company that knows radio and has been around for a long time. And the product was designed for the smaller broadcast production market rather than the huge “home recording musician” market thus putting radio production people, and their satisfaction, at the core of the product’s user base rather than on the fringe.
Audicy specs include frequency response (analog I/O) 20Hz-15kHz at 32kHz sampling, 20Hz-20kHz at 44.1kHz sampling, S/N ratio >90dB, and total noise+distortion <0.005%. The real-time internal digital effects utilize 24-bit processing. Input D/A converters are 18-bit 64x oversampled delta sigma; output 16-bit, 8x oversampled. Recording is 16-bit linear PCM at 32kHz for 44.1kHz. The internal 2-gig SCSI drive stores eight hours of audio at 32kHz sampling.
♦