
![]() Q It Up: What’s the method to your mix? Do you just throw all the elements on their tracks and begin adjusting levels as your ear dictates? Do you start with the VO and adjust everything else around it? Do you use EQ to bring elements out in a mix or subdue others? Do you use compression on the stereo master to minimize all the tweaking, or do you try to retain as much dynamic range as possible? Do you use compression on individual tracks to reduce the dynamic range of a VO track, a music track, SFX? Do you switch between different monitors and tweak accordingly? Describe your method, and feel free to add any other approach that gets you to your ultimate goal.
Q It Up: What’s the method to your mix? Do you just throw all the elements on their tracks and begin adjusting levels as your ear dictates? Do you start with the VO and adjust everything else around it? Do you use EQ to bring elements out in a mix or subdue others? Do you use compression on the stereo master to minimize all the tweaking, or do you try to retain as much dynamic range as possible? Do you use compression on individual tracks to reduce the dynamic range of a VO track, a music track, SFX? Do you switch between different monitors and tweak accordingly? Describe your method, and feel free to add any other approach that gets you to your ultimate goal.
Ian Fish [Ian.Fish[at]chrysalis.com], Chrysalis Group, London, England: I always start my mix by getting the right sound (through EQ & Compression) on the voice(s) and then mix sound effects, music, and plugin effects around them. The voices are nearly always “compressed to F***” (my own ‘CTF’ setting on the L-1 ultramaximizer), but the music I leave as untouched as possible, apart from the necessary volume changes, as it’s usually heavily compressed already. The voices and the music/fx are routed over 2 separate buses, via a MASTERX 3 channel “finaliser” on each, along with a third bus for reverbs/echoes, etc. to the master output.
I use a standard template, with all the plugins and routing already set up, and with some careful level control, I know if I’m in a rush I can normalize the voice track to -7db and the music track to -8db, and the MASTERX’s will take care of the mix, almost by themselves. Of course I hardly ever do that, and even last minute projects that start on air in 5 minutes are subject to high levels of professional scrutiny and years of mixing experience (!).
I have 3 sets of speakers in the studio, big JBL Control 5’s for showing off, small JBL control 1’s for day to day mixing, and tiny, cheap, truly horrible PC speakers for checking mixes in both mono and stereo. Amazing how different a mix sounds on the different speakers, and in mono or stereo.
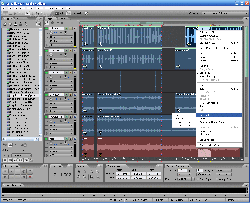 Steve Stone [sstone[at]zrgmail.com]: I’ll start by saying that I swear by Adobe Audition 2.0 with dual screen. I just wish there were compatible control surfaces. As far as my mixing procedure, it all depends on what I’m mixing. For client-read rip-and-reads, I’ll usually just process their voice (we use dbx 286’s on all mics, and I’ll often hard limit at -3 and boost the input by 3db to thicken it up and minimize level fluctuations), then I’ll listen back with their music bed. Our production rooms are equipped with reference monitors that cost more than I make in a month (each), which is great for hearing every nuance. However, I ALWAYS listen back with the cue speaker in the console at a low volume to assure that the music is not impeding the voice.
For more complex sessions with sound effects, multiple vocal effects and music change-ups, I always place the dry vocal(s) in the top tracks of the multitrack window, then below them I’ll place the sfx, then the music always on the lower tracks. After I’ve got all my elements in place and locked in time, I solo the vocal tracks and check for level drops or spikes. This is when I miss VU meters. Next, I bus all the sfx, zips, explosions, etc. to bus A and control all parameters with my bus strip. This feature also works well for mixing music sessions, especially for harmony vocals. I then automate any effects and/or level changes necessary. Audition 2.0 has an incredible mixer window that makes mixdowns FUN! Finally, I’ll listen to my rough mix in 3 different speaker setups before saving a final mix. I normally don’t compress my final mix, but I do like to expand the stereo field.
Ryan J. Drean [Ryan.J.Drean[at]abc .com], KSCS-FM, www.ryanon theradio.com, Dallas, Texas: I always start with a template. I have 2 main voices at KSCS so 2 main templates. (Other stations I do I have completely different setups for.) Each template is different only as far as the vocal tracks are processed and EQ’d. My session is made up of 6 mono “Voice” tracks, 6 stereo tracks, 3 aux tracks and one master. The top 2 mono tracks are pushed left and right with an EQ on each cutting about 500hz and below. I have the voice tracks bussed to aux 1 which has an L1 with pretty heavy compression so the voice will almost always cut through whatever else may be in my mix. On aux 1 is also REQ which is there to roll off the lows below about 200Hz and kick up the highs. I also have a gate on there for extra room noise.
Once upon a time I learned from Chase that the order of the plugs does matter, so I have the L1 at the top then the EQ then the Gate. Of course, I am not smart enough to know if that is the “correct” order, but it seems to sound okay on the air. I have the second aux set up the same, to simply give me an easy way to add crazy verb or delay or maybe the morphoder. The third aux has a metaflanger and an REQ with a lot more low rolled off, plus the L1 of course. On the Master I have another L1 with just some light compression for the overall mix. This also acts as my training wheels on the session to put a nice floor and ceiling on everything and stop over modulation that may happen with some audio on the mono tracks. I am also toying with the C4 on this but haven’t made it official since I haven’t found the right setting yet.
One thing to note is this setup is horrible when you are looking for A LOT of dynamic range. It keeps everything very fat and punchy and really makes sure everything is loud on the air and pretty unaffected by station signal processing. It does not give you an extremely pure sound.
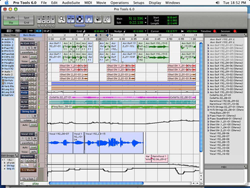
As far as the actual production, I tend to build around the voice tracks, but there is no absolute routine. I can say the one thing I never liked about Pro Tools versus Cool Edit, for example, is when you apply envelope changes, it does so to the track and not the waveform. Thus, levels are always getting tweaked up on blocks to which I would otherwise not want that happening. (Again, if I were smarter, I would stop this from happening.) That is why I try to adjust volume changes at the very end of a project. Of course, that is one of very few things I can say is bad about Pro Tools. No one ever complains about bouncing in real-time, right? I would also change that.
Everything I do I learned either the basics for or the exact method of, from someone else. That is why I can’t wait to read these because I will probably have hours of new stuff to try! Plus, in case you don’t know where you are in relation to the Big Guys in the world of radio imaging, ask them. Ask for a screen shot of their session or the settings of their specific plug-ins. I had very good luck about 5 years ago when I started getting serious with this. I had the biggest names writing me back, quickly! They gave me tons of suggestions and critique and even invited me in to shadow. That type of help is invaluable, and you will be surprised at how helpful folks can be.
 Craig Jackman [craigj[at]canada.com]: The quick answer is all of the above. Typically, I just throw everything up and start tweaking until it sounds right. It starts with getting the spot length right first, then having the voice set and sounding good, then its filling in the colors, finger painting between the lines of voice and time. That’s why having dual monitors using Adobe Audition is so handy, as I’m back to having everything I need to see available at a glance with the mixer window on one monitor and the multitrack screen on the other. It’s just like having the mixer below my fingers like it used to be.
Another holdover from the tape days is I try to put things into the computer at close the level they are going to be in the mix, so I don’t have to haul something down 13 dB just to hear the announcer. I do use EQ to bring voices more prominence, and I do use EQ to scoop out room for the voice from music tracks or SFX. It’s not a lot of EQ; typically, less than a dB plus and minus using the Audition track EQ in multitrack is enough. While it’s rare, I will use a compressor across a stereo mix if it sounds better, but typically I try not to do that since it’s going to get squashed all to hell going through the transmitter chain. If I do end up throwing a compressor across the mix, it will usually be a multiband compressor. I always end up adding a regular compressor to voice tracks, even to station announcer voice tracks coming in pre-processed, but I don’t think I’ve ever thrown a compressor on a music track aside from the stereo bus compressor already mentioned.
While I do most of my monitoring on the main speakers in any particular studio, I do run mixes that are really important through the cue speaker on the reel-to-reel machine to give it a real world test in glorious mono... it’s the only reason I keep a reel deck in the studio. As with most things in radio these days, all that matters is what comes out the speakers. What you have to do to get it to that point is what you have to do to get it to that point. No rules, only results.
Franklin Raff [fraff[at]radioamerica .org], Radio America Networks: In 1997 my business partner, Tom Jameson, composed the following short poem about radio production:
The Sublime Parasite.
It disregards the trespass it has made,
By creeping stealthily into your ears,
And paints a picture that will never fade,
And whispers through your brain-cells: I Am Here.
I always loved that poem. Reminds me of that worm in the guy’s ear in the Wrath of Khan.
So: Close your eyes. Turn off the lights. Crawl into a broom-closet and bury your head in your hands. Can you feel the piece? There is a core moment, a movement, a punch. It’s what inspires you; it’s what delivers the emotional injection. Isolate it in your mind. It is the pivotal moment, the center of your visual now, and it will be the center of your mix. See it, lay it down, and build around it. Your piece traces an arc in sound, a trajectory. See the apex of that trajectory. That’s when the piece explodes. Mix the ingredients of that chemical reaction, and surround your explosion with those catalysts. Is the launch a bang or a whisper? Does it hiss like an approaching viper? How does the piece crawl - or march, or drip, or slither - into your ears? What color - what emotional temperature is the lead up? Say the viper strikes in a shot of blue, an icy sax riff over a sweat-stained sheet in the Moment of Truth or a high-velocity plunge into a violent, freezing sea. You know you need to go warm around the edges to rock the apex. You know the shock needs to come like a total reversal, a blade into the spine: you launch with warmth, strength, heat - with pistons and passion - and you turbocharge the lead-up with a fiery, panicked horn-blast in the last second. You use a reversed, swinging, up-pitched cymbal to paint the first moments of the icy dive. EQ mirrors (or reverse-mirrors) the devastating frequency shift. Bubbles and a guitar scream. A violent expansion in blue. This is the moment you brought us here for. It is a climax you crafted - it may be one of many in the piece - and its intensity is determined by the clarity of that first picture in your mind. See it. Close your eyes and see it.
Ralph Mitchell [RalphMitchell[at] clearchannel.com], Clear Channel, Mobile, Alabama: My approach to mixing depends upon the type of spot I’m mixing AND what station it is going to air on (if I have that information up front). The audio chain varies from station-to-station even within a given cluster due to the nature of the programming. If I know with 100% certainty that a spot is only going to air on our AM News-Talk station, it will get a mono mix, often with minimal processing since that station is already heavily compressed. If the spot is going out-of-house, then I have no idea what will happen to it once in someone else’s hands. I try to tweak the mix in different monitors and find an acceptable balance.
As a rule, though, compression beefs up the “announcer” part of a spot because the clients expect that commanding sound that brings the announcer right up front with their message. Animated dialog, however, is usually left uncompressed to allow the full dynamic range that a voice actor needs to deliver the emotion in his character. Mic technique is a big part of my mix when using such dialog. Not every voice has to be in your face. Some lines are more about emotion than the words themselves, and backing off a mic so you can hear the room is a big part of making a spot interesting and unpredictable.
I use EQ as little as possible, saving it only for the spots in which I voice multiple parts myself. One character may be a half or full semi-tone higher, and the opposing character, a half or full semi-tone lower. Usually, I pan those opposing voices 25% to 30% off of center to help separate them. Much more might cause problems on some stations.
After getting the voices where I want them on the time line, I add in whatever ambience or music that helps move the story along and then tweak the levels of each element to make sure nothing gets lost. By this time, I’m so intimately involved with the spot that I know the lines so well that it may be hard to tell if the sfx or music is overpowering, so if time allows I like to walk away from it and come back a little later to listen with a fresh perspective. Then I play it without looking at the script. I just turn the speakers down low and play it through to see what’s missing. Sometimes this brings about another round of tweaking, and other times I may notice that it feels like something’s missing. Maybe the tail of a word gets lost because of the ambience track, so I’ll try ducking the sfx just enough to allow the line to come out. I never process the ambience track because the dynamics of a surf sfx, for example, should add to the overall story and not dominate it.
The main thing I always keep in mind comes from my TV days. I was learning to direct TV production and my lighting director, who was a known master in his craft, advised me (as I was trying to fill :30 with as many digital effects as possible) that you don’t do effects just because you have the ability to do them. You only use them if they help convey the message or move the story along. Every time I start applying effects to an audio mix, whether mixing live sound at church, or making radio and TV spots, I hear the words of my old friend from Hong Kong, Wayne Chuck: “Why you do that? You want to impress somebody, or you want to make message known?” We need to stop trying to impress our piers and win awards with bells and whistles, and instead start mixing to help our client.
Gary Michaels [michaels[at] wask.com], WASK/WKOA/WKHY/WXXB/ESPN Radio, Lafayette, Indiana: My primary MO is to lay down the voice track first and then edit and add later. The only time I use a production studio is when I need a hot mic; the rest I do at my desk on the PC with a good set of cans. I add music/fx to other tracks and then stir the whole recipe.
Some of the more experienced voices in the station don’t need embellishment at all. It usually depends on how the talent worked the mic. The weaker voices, clients and some of my female talent will need some compression (usually 2 or 3:1) to bring them to the forefront. I’ll sometimes eq the mids down in the music bed to help in the same way. Sometimes I’ll add a couple milliseconds of slapback if the spot needs some energy. It’s all pretty simple, and I don’t spend an inordinate amount of time on it. I want as clean a sound as possible, but sometimes I have to jump through hoops if the client or talent worked the mic 12 inches away.
Anthony McNutt [amcnutt[at]ns. sympatico.ca]: Cool question...it will be very interesting to here other people’s approaches! When I start my imaging, I throw up a voice track on Cool Edit and start from there. I then add some compression to the voice. In my opinion, there is no sense compressing the main mix when the fx’s and music are already compressed. After I find a tune, I start to match up the beats with the tune. I will copy and paste certain words on off beats and change the eq and effects on each part. I usually pan off the secondary voice and drop the db so it kinda goes among the missing.
After that I add a few fx’s here and there, but not zaps and stingers to cover edits...I HATE THAT. Some people are all about the zaps and stuff, which is OK, but I like the imaging to flow like music. I hope I am making that happen. After I get the voice, bed and fx’s down, I start to effect my voice and secondary voice and layer it. I use a lot of fx’s but try to stay away from my crutches.
After I get it to where I am happy, I mix ‘er down and have a listen. Then I go back and usually change a whack of fx’s. After that I mix it again and slap it on another multi track with a song on either side of it to see how it will sound with the tunes. Then I go back make a few changes and do the final mix where I just Normalize and not compress...have another listen and crack a Bud!!!!
♦