by Jerry Vigil
Digital workstations are quickly becoming standard gear in production studios worldwide. But you might be surprised at how many stations still dub their digital production to analog carts for airplay. Certainly, for these stations, upgrading to a completely digital on-air system is in future plans, and it's no surprise that a station might upgrade their production studio before converting the on-air studio--the latter can be a much greater task. Still, it is a task that is inevitable for any station that plans to stay in the game. The question is, which format to take. Some stations opt for the hard disk storage/retrieval systems where everything is stored on file servers tucked away in a closet or corner somewhere. Other stations will choose a more visible format, one where you can actually hold in your hand the various elements that make up the programming day. For these stations, the Dynamax DCR1000 Series Digital Cartridge Machines from Fidelipac are the answer. Carts are replaced with floppy disks which you can see, touch, take from one room to another, label, and so on--all the things you can do with carts, minus many of the problems inherent with carts. And there are many pluses with this digital format that analog carts can't touch.
The Dynamax DCR1000 cart machines aren't new, but Fidelipac recently introduced magneto-optical drives and disks as options. The MO version is the one used for this Test Drive. The original machines are equipped with drives that use 3 1/2-inch floppy disks available in two sizes. The 2MB disk is the standard 3 1/2-inch floppy you can get at the local computer or office supply store. With the 2MB disk, variable sampling frequencies enable recording anywhere from 37 seconds of 44.1kHz stereo audio to 2 1/2 minutes of mono voice quality audio to a single floppy. With the sampling frequency set at 26kHz, a 2MB floppy delivers 63 seconds of stereo recording time. And the cost per disk is nothing compared to the cost of carts. Get a box of 200 2MB disks from Fidelipac for just fifty dollars. That same fifty dollars will get you about ten analog carts. For stations wanting to put longer program material onto disk, the 13MB disk is available at about eleven dollars each. A 13MB disk can hold up to five minutes and ten seconds of 32kHz stereo audio and up to fifteen minutes of mono voice quality audio (22kHz sampling frequency).
The new magneto-optical drives unleash the power of the DCR1000s by providing literally hours of recording time per disk. At $18 list, the 128MB disk will hold an hour and six minutes of stereo broadcast quality audio (32kHz sampling) or over three hours of mono voice quality audio (22kHz sampling). At $32 each, the 230MB disk provides just under two hours of stereo recording time (32kHz sampling) and almost SIX HOURS of mono voice quality audio (22kHz sampling). With these lengths, the DCR1000 can be used for virtually any and all program material. The MO disks are the same size as the 3 1/2-inch floppies but are about twice as thick. (The "apt-X" audio compression algorithm is used to achieve a 4:1 audio compression ratio.)
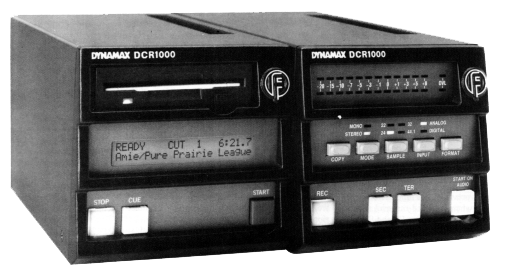
The extended recording times offered by the MO drives is a big plus, but the real beauty of the DCR1000 is the user interface. It's obvious that from the beginning this digital cart machine was designed to make the transition from conventional carts to digital a painless procedure with essentially no learning curve. This task is accomplished with a front panel on the playback unit that cannot get any simpler. There's a STOP button, a CUE button, and a START button. A 2-line, 24-character LCD display, a slot for the disk, and an eject button complete the front panel. Playing a disk is practically identical to playing a cart in a conventional deck. Insert the disk, and the DCR1000 automatically cues to the desired cut. Press PLAY to start playback. Press STOP to stop playback. If there's anyone on your on-air staff that can't figure this machine out right away, they probably have trouble using their car radio as well. If there is more than one cut on the disk, press the CUE button to scroll through them.
The disks are enclosed in a hard plastic shell and feel very sturdy. Though you certainly wouldn't want to "slam" a disk into the drive, you can firmly insert it without it feeling as though you're dealing with a very delicate instrument. The mechanism feels sturdy enough to handle the daily, rugged use it would no doubt get in a 24-hour a day, seven day a week studio. A solid "click" is heard when the disk is inserted properly and a green LED on the drive lights to indicate that the drive is active. When the audio is cued, the LED goes out. The 128MB disk used for this review cued about three to four seconds after insertion. Pressing the small eject button on the drive ejects the disk in about three seconds.
When a disk is inserted and cued, the LCD display shows the Play Mode (more on that later), the cut number, and the cut length on the top line. The bottom line displays the cut title while in the Stop mode and displays an outcue when in the Play mode. In effect, this display provides the information you would normally get from a cart label (and the display itself is about the same size as a cart label). An added plus is that the length on this cart label is "live" and counts up or down as the cut is playing.
As you can see, there isn't much to learn about the DCR1000 as far as playback is concerned. As a result, the playback units can be installed in an on-air studio with little or no time spent learning how to use them. Recording on the DCR1000 is a bit more involved, and it's necessary to spend just a little time with the manual if you want to take advantage of all the available features.
The record module features large LED bargraph meters for metering playback and record levels. Two OVL (overload) LEDs light to warn of digital clipping. In the middle of the record module are five function buttons. The COPY button enables copying audio from one disk to another. Push the MODE button to switch between mono and stereo recording modes. Mono and Stereo Mode LEDs indicate the active mode. Press the SAMPLE button to toggle between 22kHz, 26kHz, 32kHz, and 44.1kHz sampling frequencies. Four red LEDs indicate which sample rate is active. Press the INPUT button to toggle between analog and digital inputs. Press the FORMAT button to format or erase a disk.
At the bottom of the record module are four buttons, three of which are found on analog cart record decks. Once record modes and sample rates are set, press RECORD. The display shows how much recording time remains on the disk. Press START (on the playback module) to begin recording, or press the START ON AUDIO button (on the record module) to initiate recording once audio is present at the inputs. The SEC and TER buttons are for, you guessed it, secondary and tertiary "tones" or cues. To end a recording, press STOP (on the playback unit). This places a secondary cue at the end of the recording. Tertiary cues are recorded by pressing the TER button. Each cut can have up to eight tertiary cues.
Up to sixteen cuts can be recorded onto the 2MB and 13MB disks. The MO drives/disks allow for up to 99 cuts per disk. Each cut is recorded to the disk in a linear manner, one after the other. This lets the drive read and write as efficiently as possible because the head is not bouncing all over the drive to find the various pieces of a cut. This also prevents problems that occur with disks becoming "fragmented." The only drawback to this format is that if you decide to record over a previous cut on the disk, the new recording cannot exceed the length of the original as this would cause the next cut to be recorded over. When the maximum length is reached, the recording simply stops. This is no major drawback and only means you have to check lengths of previous recordings before replacing them.
A PC/AT keyboard plugs into the back of the record unit and enables titling cuts, entering outcue information, and accessing several functions of the DCR1000. Press Ctrl-F4 to set the Play Mode (mentioned earlier). In Manual Mode, the disk cues to cut 1 when inserted. Press the CUE button to cue to other cuts. In the Cart Mode, the disk cues to the next cut each time it is inserted. For example, let's say there are four cuts on the disk. When inserted, it will cue to cut 1. After cut 1 is played, it will cue to cut 2, and it will remember to cue to cut 2 even after the disk is removed and reinserted--just like an analog cart. In Theatre Mode, the disk cues to cut 1 on the disk. After playing cut 1, it cues to cut 2, after cut 2 it cues to cut 3, etc.. However, if removed and reinserted, it will cue to cut 1 regardless of which cut was played last.
This Play Mode information is recorded to the disk. So you are setting the Play Mode for the disk, not the unit itself. Let's say you have a disk with four Pepsi commercials on it and the Play Mode is set to Cart. The spots will rotate in the order they were recorded. But you also have the option to alter the rotation order by pressing Shift-F5. You can change the order of the rotation, but the rotation percentage must remain equal for each cut. To get one cut to rotate a greater percentage than the other, use the Copy Cut Header function by pressing F3. This makes a copy of the cut without using additional disk space. If cut 2 of our Pepsi rotation is to play 50% while the other three rotate, make three copies of cut 2 and put them in the rotation to run every other spot.
Press F5 to access the Cut Chaining function. This lets you play several cuts back to back in any order with seamless edits. Press Shift-F8 and F8 to edit the start and end points of a cut. There is no audio "scrubbing," but it is easy to accurately adjust start and end points in 1/10 or 1/100 second increments. The Space Bar can also be used to set the start and end points on the fly--a good way to set points when looping music.
This is a good time to remind you that the DCR1000 cart machines are not digital workstations, and they don't try to be. But there are a number of editing functions available that give the experienced user plenty of room for creativity. For example, press F4 to set the Loop Flag on a cut. This will make the cut play in a seamless loop, ideal for making long music/sound effects beds. An interesting use the manual suggests is "variable length beds." This uses Cut Chaining with three cuts. The first cut is the open of the bed which might contain announcer VO over music. The second cut is the "middle" of the bed. Set the Loop Flag on this cut so it plays continuously. Cut three is the close. Now, with all three cuts "chained" together, press PLAY. The intro plays then goes to the bed and the loop begins. Let's say this is for a live traffic report. When the traffic report is done, press START to end the loop and proceed to cut 3, the close. Pretty nifty. It takes a little work in production, but once it's recorded to disk and put in the control room, it's a piece of cake to use. In effect, you get cut and paste editing, and it's on a cart machine!
Other "flags" that can be set for each cut are the Skip Flag which prevents the cut from being played. The Outcue Flag determines whether or not the user defined outcue will display during playback. Setting the Safe Flag prevents recording over a cut. Setting the Log Flag enables logging information to be output at the RS232 port on the rear panel.
Press F1 to set the Kill Date for a cut. When the date is reached, the cut cannot be played if the Kill Date Checking mode is active. The display will read, "PAST KILL DATE." A pretty handy way to prevent those embarrassing moments when outdated material mistakenly hits the air. Press F2 and Shift-F2 to edit the cut title and outcue. The number keys serve as "instant cue" keys for the first ten cuts. F6 and F7 are used to edit the secondary and tertiary cues. Press the PRINT SCREEN key on the keyboard, and the DCR1000 will print a label for your disk on a 24-pin, Epson compatible, tractor fed printer.
A Setup Menu is accessed by pressing the CUE, START, and STOP buttons simultaneously. Here you can set the printer left margin, set the default Play Mode, disable sampling frequencies you might not want anyone to record at, set default sampling frequencies, set the internal clock and other operating parameters.
The rear panel of the playback unit delivers XLR balanced outputs, XLR AES/EBU digital output, the RS232 port mentioned earlier, a remote control port, A/C power connector, on/off switch, and ports for connecting the unit to the record module and other playback modules. The record unit has XLR balanced ins, an XLR AES/EBU digital input, a printer port, and connector for the keyboard.
Reported specs include frequency response at 20-20kHz for 44.1kHz sampling, 20-15kHz for 32kHz sampling, 20-12kHz for 26kHz sampling, and 20-10kHz for 22kHz sampling. Dynamic range is >90dB, THD is <.05%, output level is adjustable from -10dBu to +20dBu, and crosstalk, wow and flutter, and phase error are unmeasurable.
My first reaction to the DCR1000 was, "Where were these things when I was on the air?!" Aside from that, I found the DCR1000 to be everything a digital "cart machine" should be. It is certainly as easy to use as a cart machine, and there are plenty of extra features to make the unit more than just a cart machine. When used with the larger 128MB and 230MB disks, the DCR1000 becomes a digital storage/retrieval system as well. While the long recording times available on the magneto-optical disks certainly provide enough recording time to store long programs and multiple songs for the on-air studio, these disks also become great storage mediums for production elements that are used regularly. Use a disk to store often used music beds and sound effects. Another disk could hold raw voice tracks from your "voice guy/girl." Each station producer could have his/her own disk(s) for storing their favorite production elements. Each air personality could walk into the on-air studio with one disk filled with all of their own sound effects, beds, IDs, etc.. With up to 99 cuts per MO disk, that's the same as eliminating 99 carts with something that will fit in a shirt pocket.
The DCR1020 is the Master Player unit which lists for $2,975. Add the MO230MB drive for $500. Upgrade earlier models to the MO drive with the MO230R for $650. The DCR1040 Record Module lists for $2,500 and comes with the keyboard and a template. Options include rack mount kits, a label printer, diskette racks, maintenance kits, and more. Since the introduction of the MO drives, Fidelipac reports that many stations ordering the DCR1000s are ordering a combination of units with the 2MB drive and the MO drive enabling the stations to take advantage of the low cost of the 2MB disks while having the capability to take advantage of the long recording times available on the MO disks.
It's no question that the DCR1000 is a well designed, well built machine. Perhaps the bigger question is deciding upon this format versus a large disk-based storage/retrieval system where the only connection between you and the audio is an icon on a screen. But don't hate having to make these decisions. We should be glad that today's technology provides us with these choices to begin with. No too long ago, the only decision to make was what brand of cart to buy. One major advantage the DCR1000 format has over the other is the fact that the medium is still a cartridge--smaller and better sounding, but still a cartridge. For those who fear "giant disk crashes" destroying all your commercials and promos, this is your format. If the staff at your station is not comprised of a bunch of Internet junkies hauling laptops around the studios, this digital format is for you. If you want to stay on top of the digital revolution but want to feel "at home" in your studios, the DCR1000 digital cart machines are for you. You get a quality product from a company that knows the broadcast industry and has been here forever.
♦
