by Jerry Vigil
In the world of digital multi-tracking, two tape-based systems have gained wide acceptance. First came the ADAT which records to S-VHS video tape. Alesis and Fostex offer the machines for this format. Then came the DTRS (Digital Tape Recording System) format, introduced with the Tascam DA-88, which records to Hi-8mm video tape. Late last year, Sony entered the Hi-8 format with the PCM-800. Both formats provide eight digital tracks with up to one hour of recording time on S-VHS format and nearly two hours on the Hi-8mm tapes.
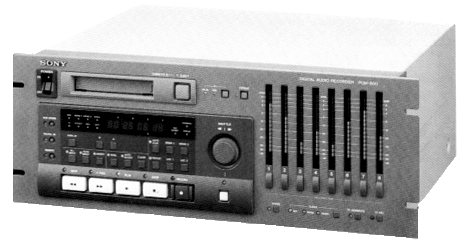
The PCM-800 is essentially identical to the DA-88 with most differences appearing on the rear panel, and Sony opted for a dark grey front panel as opposed to Tascam's beige. Unlike the DA-88, the PCM-800 provides balanced XLR analog inputs and outputs (unbalanced RCA on the DA-88), and the PCM-800 offers AES/EBU digital I/O via two D-sub 25-pin connectors. Other rear panel connectors include the Meter Unit 15-pin connector to drive external metering. The Remote In/Sync In D-sub 15-pin connector is where the optional RM-D800 remote control is connected, and it is also used (along with the Sync Out connector) to hook up multiple PCM-800s. Up to sixteen PCM-800s can be hooked together to provide up to 128 tracks. There are Word Sync I/O connectors and a remote Punch In/Out jack for a footswitch. The Machine ID rotary switch assigns an ID number to the machine and is used when two or more PCM-800s are synchronized. Four red LED Error Indicators light when the sampling frequency and emphasis settings of digital input signals don't match the settings on the PCM-800, or when there is no signal at the digital input. Finally, next to the AC power connector, a large heat sink occupies about one-third of the back panel. The optional DABK-801 Sync board fits into an empty slot on the back panel and provides SMPTE/EBU time code synchronization, a time code generator, MIDI machine control, and NTSC/PAL video synchronization.
The front panel tour begins with the Power On/Off switch at the top left adjacent to the tape loading door and EJECT button. The small Hi-8mm tapes are about the size of a cassette and a little thicker. Upon insertion, the PCM-800 grabs the tape and loads it, closing the door behind. As it's doing this, the orange LED time display below reads "LOAD" then displays the current absolute tape time in hours, minutes, seconds, and frames, assuming the tape has been formatted. Formatting is a real-time process and must be done before any recording can occur. Sony's DARS-116 tape, designed for digital audio recording, provides 116 minutes of recording time and takes 116 minutes to format. Press the FORMAT key to engage the format mode, then press the Fs key to select the sampling frequency, 44.1kHz or 48kHz.
The transport controls are very large. You get REW, FFWD, PLAY, STOP, and RECORD. To the right of these are the SHUTTLE button and dial. Pushing the button activates the shuttle function. Turning the dial in either direction plays back the tape at variable rates between ¼ normal speed and 8 times normal speed. This is handy for locating precise points on the tape, but this does not function as a way to cue up to a point for "instant start." This function is most handy for identifying punch in/out points, and it is more responsive than using the REW and FFWD buttons to maneuver within a small section of tape.
There are eight LED peak level meters on the right side of the front panel. Below each is a REC FUNCTION key and red LED indicator. Pressing the REC FUNCTION key puts the track in Record Ready mode, the red LED flashes, and that track's monitoring is set to the input signal. When recording, the LED remains lit. Below the meters are controls and indicators for time code and synchronization functions.
Most of the PCM-800s features are controlled with eighteen keys above the transport controls. Press the VARI SPEED key to adjust the PCM-800's play or record speed ±6% in 0.1% increments. The DIGITAL IN key activates the digital I/O port. Pressing the REMOTE key disables the front panel controls and activates the remote control. Press the AUTO PLAY key for automatic playback at the end of each locate function without having to press PLAY.
As mentioned, when a track's REC FUNCTION key is pressed to put that track in Record Ready mode, that track's output switches from the tape to the input. Pressing the INSERT key lets you monitor tape playback even though the track is in Record Ready mode which is necessary when doing punch-ins. The AUTO INPUT key, when used with the INSERT key, sets the monitoring so that any tracks in Record Ready mode will monitor input whenever the unit is in rewind, fast-forward, shuttle, or stop mode. This enables conversation between talent and engineer (when in separate rooms) without having to make adjustments on the PCM-800 or your console. The ALL INPUT key sets monitoring on all channels to the input signals, regardless of the transport mode.
The PCM-800 has two autolocate points. Pressing either the MEMO 1 or MEMO 2 key stores the current tape time into that memory point. Pressing the LOC 1 or LOC 2 buttons locates the tape to whatever tape time is stored in MEMO 1 or MEMO 2. Press the REPEAT key to repeat playback between MEMO 1 and MEMO 2.
Perhaps one of the nicest features of the PCM-800 is its ability to perform perfect punch-ins and punch-outs. Press the RHSL key to activate the unit's rehearsal mode. Press the REC FUNCTION key for whatever tracks you want to record on. Press PLAY to begin playback and press RECORD at the point where you want to punch in. Since you're in Rehearsal mode, it won't actually go into Record mode, and the unit will continue to monitor playback on the selected track(s). When the punch-out point is reached, press PLAY. The unit will continue to play for three seconds of post-roll, then it will rewind to the pre-roll point, five seconds before the punch-in point, and stop. The default pre-roll time of five seconds is adjustable. To rehearse the punch-in/out, press PLAY. The monitor switches to input when the punch-in point is reached and back to tape when the punch-out point is reached. When you're ready to record, press the AUTO IN/OUT key then press PLAY. The unit will automatically go into Record at the punch-in point and exit Record mode at the punch-out point. Repeat the function as often as necessary, then press the CLEAR key to exit the Auto In/Out and Rehearsal modes.
Of course, manually punching in and out is possible as well, and it is much faster to do since you don't have to set up in and out points. But, let's say you've got a perfect sixty-second voice track recorded, and you realize after the fact that in the middle of that voice track, you mispronounce a name. In the analog world, you would punch-in at the beginning of the name and just continue to read the rest of the script because the chances of you being able to manually punch out at the exact point are a little slim. With the PCM-800, once punch-in and punch-out points have been set as described above, they can also be fine tuned. Use the Shuttle function to locate the exact in and out points and make note of those points. Then, press the DISPLAY key until the MEMO 1 indicator lights. The display will show the time of the punch-in point. Use the and keys to adjust the punch-in point to the exact frame. Do the same with the punch-out point. It works like a charm. And this isn't helpful only with mistakes in the middle of reads. Use this precise punch-in/out function to do updates, replacing "tomorrow" with "today" in very tight spots in the script.
This Test Drive was done with the optional RM-D800 Remote Control Unit installed. The remote control is highly recommended for the radio production studio primarily for its 99-point autolocator and ability to enter locate times with a numeric keypad. A "jog" function is added to the Shuttle dial which aids in locating exact points on tape, though it is not as smooth as scrubbing in RAM.
There are two time displays on the remote control: the Tape Time display and the Locate Time display. Pressing the LOC button locates to whatever time is displayed in the Locate Time display. On the PCM-800, only Absolute Time can be displayed. On the remote control, both Absolute Time and Relative Time can be displayed. This is helpful when you need to keep track of the length of a production. Your tape time might be 01:18:44:33. That's one hour, eighteen minutes, forty-four seconds, and thirty-three frames into your tape. If you start a production from this point, it's difficult to glance at the display and see how long your production is at any point. Using the Relative Time function, this point in the tape can be set to zero Relative Time. Furthermore, the time displays on the remote control can be set to display only hours, minutes, and seconds, leaving off the frames display and making it even easier to read at a glance. However, the frames display is helpful when cuing to precise points with the Jog/Shuttle dial.
Storing and recalling any of the 99 locate points is as simple as can be. Press the STR key followed by the number of the desired memory location using the numeric keypad; whatever time is displayed in the Locate Time display will be stored in that memory location. The Tape Time display is above the Locate Time display. Pressing the key on the remote control (different from the key on front panel of the main unit) "drops" the Tape Time down into the Locate Time display. Now the current Tape Time can be stored to a memory location with a minimum of key presses. Or, if you don't care what memory location the current Tape Time is stored into, simply press the CUE STR key, on the fly if you wish. The current Tape Time drops to the Locate Time display, and that time is stored into the next "empty" memory location. The Memory Number LED display to the left of the Locate Time display shows the memory location stored to or selected when recalling locate points with the RCL key.
Several other menu-selectable functions are accessed from the remote control using the 2-line x 16-character LCD display to the left of the red LED time displays. A set of keys below the LCD display select options from four menu groups. In radio production, most of these options would be seldom used, but you do get access to more useful things such as Locate Pre-roll Time, Pitch Control, Frame Display On/Off, Crossfade Time, and more.
The top of the remote control is filled with forty-eight track REC FUNCTION keys, each with its own red LED. Obviously, this is the remote control used to operate six PCM-800s in a 48-track setup. It might be overkill for an 8-track setup, but a smaller remote with all the other features isn't available, at least not yet. There are no meters on the remote control, and it is helpful to be able to see what track has what audio on it at any given point. Therefore, it's a good idea to install the PCM-800 within eyesight when the remote control is going to be used. Otherwise, there's no reason to touch the main unit except to load and eject tapes.
Overall, I found the PCM-800 wonderful to work with. The transport mechanism feels solid and relatively fast, considering how complex and delicate the mechanism is. There is no learning curve. If you know how to use an analog multi-track, you know how to use the PCM-800. If you want to access features such as the auto punch-in/out function, you'll spend a few short minutes in the manual, then you'll have it mastered. What is really exciting about this format is that on a small Hi-8mm tape you get 116 minutes of digital 8-track recording. That's the equivalent of nearly four large reels of ½-inch or 1-inch analog 8-track tape. The storage advantage is tremendous. And the price is right. List price on the PCM-800 is $5,995. Add the RM-D800 remote for $1,500.
Specs include dynamic range more than 92dB, THD less than 0.007%, and channel separation more than 92dB, all at 1kHz. Frequency response is 20-20kHz and quantization is 16-bit linear. The PCM-800 takes up four rack spaces and weighs a hefty thirty pounds.
Tape-based multi-track versus disk-based multi-track? That's another article and an ongoing debate. There are advantages and weaknesses on both sides. Sure, there's a lot to be said for cut and paste editing on disk-based systems. But there's a lot to be said for the affordable storage advantages of tape-based systems. And for the price of the PCM-800, your options in disk-based systems is quite limited. And nobody can dispute the ease with which one can convert their studio and personnel from analog 8-track to tape-based digital 8-track. Personally, I think a combination of both formats is ideal for the radio production department. For those long programs like holiday specials, pre-recorded talk shows, or even weekend music programs, the tape-based format is perfect and doesn't use up valuable disk space. If there are producers on staff that can't get the hang of the disk-based system, the PCM-800 keeps them in a familiar format, yet provides digital quality. The PCM-800 can also serve as a very affordable back-up system to a more expensive disk-based system, keeping you in the digital multi-track world, even when your workstation needs work. Or you could use the PCM-800 in a way it was never intended to be used...as a stereo mastering deck. Take your stereo master bus and send the left channel to tracks 1, 3, 5, and 7; and the right channel to tracks 2, 4, 6, and 8. When you fill up tracks 1 and 2, rewind and start on tracks 3 and 4. Now you have a deck that provides almost eight hours of digital stereo audio on one Hi-8mm tape! That's four times as much as you can get on the longest DAT!
♦
