by Jerry Vigil
The DD-1000 is basically a 2-track digital recorder with some 4-track characteristics. It also resembles a sampler, a giant sampler. The DD-1000 also acts like a sequencer of sorts. As you get further into the DD-1000's many functions and capabilities, the enormous power of the machine becomes evident. In fact, there is so much the DD-1000 can do that we had to re-examine just how this review should be written, and it was decided this review should answer one question: What can the DD-1000 do for ME, the radio production person?
With that in mind, we won't get into the unit's extensive time code capabilities. We won't dwell on the comprehensive MIDI applications. We won't tell you how this machine is a must for someone who does re-mixes of songs and audio for video work. We won't bother you with a lot of the impressive technical data that is virtually meaningless to the busy radio production person. Instead, we'll plug the DD-1000 in and do some radio production.
But first, let's talk about what's at the heart of the DD-1000, the magneto optical disk drive. You've heard about, seen, and you may have used a digital disk recorder. However, most of the units you may be familiar with don't employ a magneto optical disk as standard hardware. As the name implies, magnetic technology is combined with optical technology in the form of a laser. While a conventional hard disk drive hovers the record/playback head over the rotating disk and reads and writes magnetic information, the MO drive's laser literally "melts" the digital information onto the disk. There are two major benefits to the MO method. Because the information is "melted" onto the disk, the risk of data loss due to external magnetic sources is virtually eliminated. In addition, the MO technology allows for greater amounts of data (650 megabytes) to be stored on a single disk the size of a CD.
The MO drive of the DD-1000 is a standard Sony magneto optical drive and will accept any 1024 byte/sector optical disk. These 5.25 inch disks are removable and are encased in a box not much larger than a CD jewel box. The disk has two sides and up to forty MINUTES of stereo audio can be recorded on each side for a total of eighty minutes per disk! You can record in mono and double that figure! Furthermore, the disks can be erased and used again and again. The DD-1000 has four sample rates: 32kHz, 44.056kHz, 44.1kHz, and 48kHz. The default sampling frequency is 44.1kHz which gives you thirty minutes of full-bandwidth stereo recording on each side of the disk. But again, if you use the 32kHz sampling rate (sufficient for broadcast), total stereo recording time per disk is eighty minutes.
While conventional hard-disk based recording systems limit your storage to the number of hard drives you have, the removable disks of the DD-1000 provide limitless storage capability. Of course, if you don't want to have to remove and insert disks all the time, you can always buy six more external MO drives and connect them ALL to the DD-1000 via the SCSI port on the back panel. That'll give you over nine hours (using both sides of each disk) of storage on line!
So, here you are with this digital recorder with a half-hour of full-bandwidth stereo recording available to you before you have to flip the disk over. What can you do with this recorder? Obviously, you can use it just as you would an analog reel-to-reel recorder, but there are many advantages over that old reel-to-reel.
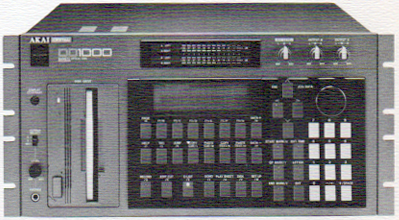
A first look at the DD-1000's front panel might be intimidating to some, but much to our surprise, the DD-1000 is very easy to use. The unit has six basic "modes." They are 1) RECORD, 2) EDIT/CUT, 3) QLIST, 4) SONG, 5) PLAYSHEET, and 6) DISK. These modes are accessed from the six Mode buttons at the bottom of the front panel. Pressing any of these buttons places the unit in that mode and the large LCD display indicates your options for that mode. Six "soft" function keys below the display access the different functions for that mode. A PAGE key to the left of the first function key accesses additional menus available in any particular mode.
Let's say you're collecting voice tracks for a two-voice spot. Voice 1 is behind the mike and ready to go. Press the RECORD button to enter the Record Mode. The display shows you the name of the take to be recorded (all recordings are referred to as "takes"). The default name of your recording is "Take 1," but you can change that by pressing the LETTER key which turns the panel buttons into a typewriter keyboard, and you can give the take whatever name you please. The display also indicates the audio source, whether it's via the digital inputs or the analog inputs. The display tells you whether High Frequency Pre-Emphasis is on or off. It tells you whether you're in Mono recording mode or Stereo. It also tells you what the sampling frequency of the recording will be and how much free time is remaining on the disk.
Assuming your input levels are set, simply press function key six or F6 (which is indicated on the display as the RECORD soft key). Bingo! You're recording with only two key presses! Once you begin recording, the display changes to the "Record Screen" which shows you elapsed time of your recording and remaining time on the disk. Function key F4 becomes the ABORT key and F6 becomes the FINISH key. Aborting the recording stops recording without using disk space. Pressing FINISH ends the recording and commits the recording to disk. (The ABORT key is also used to delete recordings from the disk.) That's it! Now, you can play back your recording with one key press, the "R PLAY" function key or F3.
Now you have Voice 1 of your two-voice spot on disk. Let's say Voice 1 has three parts to it. Now you need Voice 2's three parts to complete the spot. Press LETTER to change the name of the take to "Take 2" or name it "Voice 2" if you prefer, just as long as the name is different than that of the first recording. Press the RECORD function key and you're off! Finish the recording in the same way and send your announcers away. Now the fun begins.
You have two "takes" on disk. Let's say we've named them "Voice 1" and "Voice 2." Each has three segments that must alternate between Voice 1 and Voice 2. Go down to the MODE keys and press EDIT/CUT. Place the cursor on the "Take" field and use the DATA + and - keys or the JOG/DATA wheel to select the first take for editing -- Voice 1. The display now shows the waveform of the entire Voice 1 track. Now, press the DETAIL function key (or F1). This places the unit in an edit mode that enables editing down to individual samples and also accesses the unit's "scrub" function. Place the cursor in the START field and press JOG/ON. Use the JOG/DATA wheel to scrub the audio and cue up to the beginning of the first segment of Voice 1. That marks the start point of the first "cut." (Segments of a "take" are referred to as "cuts.") Now, move the cursor to the END field and use the JOG/DATA wheel to cue up to the end of the first segment of Voice 1. When done, the first segment will be highlighted in the display. Now, move the cursor to the CUT field and press "2" on the numeric keypad. Mark the start and end points for the second segment and do the same for the third. Now you have a take called "Voice 1" with three "cuts" defined. Press the SAVE function key (F6). Now, place the cursor on the TAKE field and select the second take or Voice 2. Mark Voice 2's three segments or "cuts" and save them. While all of this sounds like quite a few steps, it can all be done in just a couple of minutes. Editing is fast and simple.
Now we want to assemble the two voices to get our finished voice track. This is where you enter SONG mode. (Why didn't they call it the ASSEMBLE SPOT MODE? You guessed it. This is yet another machine designed for musicians, but if you look at your spot as a piece of music consisting of several elements, you'll get the hang of things just fine.) This mode lets you "sequence" takes and cuts. Using the cursor keys and JOG/DATA wheel (or + and - data keys), your takes and cuts can be sequenced in any order you wish. Voice 1, Cut 1; then Voice 2, Cut 1; then Voice 1, Cut 2; then Voice 2, Cut 2; and so on. When all steps of your spot have been defined, the PLAY function key (F3) will play the spot back in its entirety.
The SONG mode also lets you repeat any cut up to ninety-nine times before going to the next step of the "song." That may do you no good in a two-voice spot, but imagine what you can do with music beds. Not only can you loop segments of music, but you can perform these loops within and around other segments of the same piece of music or a different piece of music altogether. The possibilities for creating long music beds from small pieces of a song are endless. What's more, moving segments around within your new "song" is very easy and fast.
We found the Song Mode especially useful in building beds for concert spots and promos for "artist" weekends. Various clips from a CD of greatest hits were first recorded into the unit as various "takes." These takes were then edited into "cuts" that could be moved around anywhere within the bed in the Song Mode. Intros were extended using the REPEAT or looping function. It was very easy to replace segments with others that flowed better. Experimenting with the bed was quick, easy, and non-destructive. The QLIST mode of the DD-1000 is a more complex version of the SONG mode. The primary purpose of the QLIST mode is to accommodate the triggering of takes and cuts via an external SMPTE/EBU time code signal. MIDI messages can be sent to external MIDI instruments from the QLIST mode. Fade in/out times and levels can also be addressed in this mode. Again, this is a complex area of the DD-1000 and probably wouldn't serve the average radio production person at all, so we'll spare you the details.
Getting back to our two-voice spot, there is yet another way it can be assembled. That is with the PLAYSHEET mode of the DD-1000. As you recall, we had two "takes" (Voice 1 and Voice 2) with three "cuts" each. In the PLAYSHEET mode, these six cuts can be assigned to any of the nine keys on the numeric keypad (1-9). Once assigned, your entire spot can be played by pressing the appropriate keys at the appropriate times.
The PLAYSHEET mode is a lot like having nine cart machines at your disposal. As most of you without a 4-track or an 8-track can guess, this is a real plus. You can assign all the sound effects, jingles, zips and zaps you plan to use to the nine keys and fire them up instantly as you need them. In addition, you can create and save up to three-hundred different playsheets (per disk side) and call them up as needed. For instance, you could have one playsheet called "Jingles" with nine of your most used jingles on it. Another playsheet might be called "Weather" with nine most used weather sound effects. Another playsheet might be "Theatre Tags" with all those "Starts Friday, Starts Tomorrow, Now Playing" tags we all get tired of reading. In fact, practically ALL of your production elements can be recorded to MO disk, categorized, and assigned to playsheets.
MIDI note numbers can be assigned to the playsheet keys so the playsheet can be triggered via a keyboard or sequencer. You can adjust the position in the stereo spectrum for any and all of the cuts in the playsheet. Cuts can be faded up or down, and you have a choice of fade curves to choose from. You can choose to have a cut played only while a key is being pressed, or you can have it play all the way through after the key is pressed. Though the PLAYSHEET mode is simple to use, it is very versatile.
So far, we've given you a brief look at the RECORD, EDIT/CUT, SONG, and PLAYSHEET modes of the DD-1000. As stated, the QLIST mode is a more complex version of the SONG mode and probably not much use to the radio producer. The DISK mode of the unit is where file management occurs. This mode will only be of use to you if you have a large number of files on the disk or if you have some external drives connected to the DD-1000.
The DD-1000 can only record two tracks at a time. However, it has four outputs and can play back four channels simultaneously, but the four channels can only be played back simultaneously as two stereo pairs, or two channels as two mono channels, or three channels as a stereo and a mono -- not four mono channels. This feature will let you do overdubs, recording one track while playing back another. A RETAKE function of the DD-1000 lets you merge two files thus "freeing" up a track for additional overdubs. The four-channel output will also let you playback two cuts from the Playsheet Mode at the same time.
About the only drawback to the unit's editing capabilities we could find was its inability to perform a simple splice edit in the EDIT/CUT mode without going to the PLAYSHEET or SONG modes. In other words, let's say you opened the mike and recorded, "1, 2, 3, 4, 5, 6, 7" into the machine. Now let's say you want to cut out the "3, 4, 5" part so it reads "1, 2, 6, 7." You can't isolate and delete the "3, 4, 5" part. You have to isolate the "1, 2" and the "6, 7" separately, then go into the SONG mode or PLAYSHEET and "sequence" the two pieces together. Small inconvenience, but this is one thing that could be done faster on a reel-to-reel machine.
If you are an avid MIDI user or are involved in audio for video, particularly the syncing of audio to video, we encourage you to contact AKAI for more information on the DD-1000 or look for reviews in magazines more targeted to that industry. This review is for radio production rats, and though the DD-1000 primarily supports the music and A/V industries' needs, it is still quite a machine to have around the production room. We had six different tags that needed to go on three different spots. All six tags were recorded into the DD-1000 and were easily assigned in the PLAYSHEET mode. Afterwards, dropping the tags to cart was not only fast and easy, but fun. The non-destructive and versatile editing capabilities of the unit made it perfect for editing music beds. In the preparation of a winner promo, the listener's voice track was recorded into the unit and the segments needed for the promo were quickly isolated and easily and cleanly transferred to the multi-track. Music clips for a concert spot were easily retrieved and used again for a record spot that needed to be cut a week later. When jocks walked in with last minute voice tracks to be recorded, there was no need to load up a clean reel of tape on a reel-to-reel machine which was already in use; the mike was opened, the RECORD button was pressed, and the voice track was quickly recorded, digitally, and ready for use when the time came. When the last segment of that two-voice spot had to be changed, only the last segment was recorded and was easily placed into the "song" already created for that spot. As a sampler, the unit is fast in that there is no time spent loading files into RAM. All audio is read directly from the disk in real time, so there is no time spent loading files. Finally, it's worth mentioning again that we were pleased to find the DD-1000 quite easy to use with very little reference to the manual. Pressing the HELP key gives you on-line help with whatever parameter is selected. COPY and PASTE keys help speed up data entry.
On the technical side, the DD-1000 offers 16-bit stereo recording with eight times oversampling, 18-bit DAC, and 24-bit internal processing. Standard interfaces include balanced XLR inputs and two pairs of balanced XLR outputs. On the digital side you get an AES/EBU input and two AES/EBU outputs as well as an optical fiber input. Other rear panel connections include SMPTE/EBU time code input, Word/Video sync input, MIDI IN/OUT/THRU, RS422, SCSI, Centronics printer port, two footswitch inputs, and proprietary digital busses.
An optional DL1000 remote controller is available which allows for simultaneous control of up to seven DD-1000's. Macintosh users should also look into DD-MacRemote and DD-QMAC, the front-end software currently available for the DD-1000. The DD-1000 lists for $13,500.
♦
