 TINY SWITCHES
You’ll find four slide switches on the back of the R09. The first turns the AGC on and off, which replaces the manual-input level buttons with automatic attenuation of loud sound sources. The AGC is a not a gentle compressor — it’s a fairly severe limiter that will prevent distortion to the detriment of any dynamics you might want to capture. It’s a take-it-or-leave-it proposition, since it overrides your input settings and has no controls to adjust the effect. Since you can record at 24 bits and therefore don’t need to slam the meters, I think it’s best to avoid the AGC unless absolutely necessary.
The second slide switch, marked Ext Mic Type, lets you specify whether the external microphone you’re using is mono or stereo. If your mic is mono and the switch is set to mono, then the mic signal will be sent to both left and right channels equally. If it’s set to stereo, then your recording will appear only on the left channel of the stereo recording. Note that all recordings in the R09 are stereo — you cannot record in mono to save space on the memory card.
Slide switch three engages a rumble-reducing low-cut filter which seems to kick in around 100Hz. It’s very effective at reducing breath noise when recording speech, and is moderately effective at reducing wind noise when recording outdoors. The fourth switch is labeled Mic Gain; when set to Low it engages a 24dB pad to tame loud source sounds. With the exception of the Ext Mic Type, these switch settings affect both the built-in mics and any external mic you might connect to the unit.
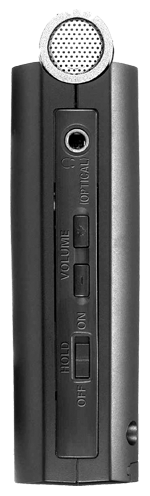
The left side of the R09 is where you’ll find the power button, a pair of buttons to raise and lower the input volume, and a jack for the included DC adapter. On the right are the playback volume buttons, the headphone/optical jack, and a Hold button that works just like the one on your iPod. For example, if you engage the Hold button while recording, the R09 will ignore the front panel buttons and continue recording.
As a certifiable Old Guy, I found that I needed a magnifying glass to read the legends for the controls, especially for the components on each side. These are labeled with tiny black letters embossed on black plastic, making them nigh on to impossible to read. In particular, the input level buttons on the left are small and can make setting levels tricky. Once you get used to what is where you’ll be okay, but it’s tough sledding at first.
Incidentally, you’ll want to mind your input levels when recording, and avoid the peak LED at all costs. The LCD meters are snappy and animated, but they are calibrated with zero headroom. If the input signal peaks at all, then on playback you may notice a little distortion has crept in.
