THE INTERFACE
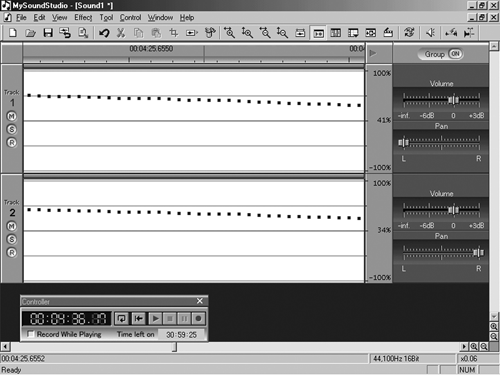
MySoundStudio’s interface is very simple, with the customary Windows iconic toolbar across the top. Tracks and their waveforms occupy the bulk of the track window, with labels plus Mute/Solo/Record buttons on the left, and associated volume and panning sliders on the right. Both horizontal and vertical zoom buttons are located along the bottom of the track window, along with the scroll bar. If you’re one of those home movie buffs, then your imported AVI or DV video track will appear along the top above the time ruler.
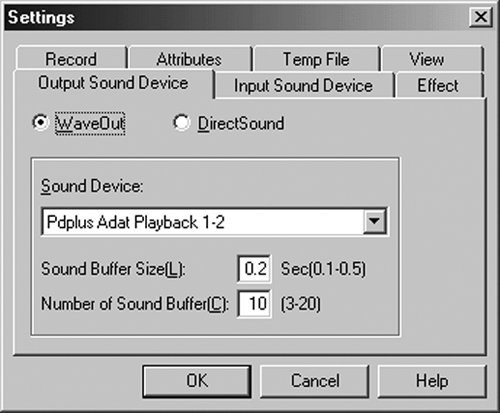
There’s also an independent transport window that contains the counter and the transport buttons, along with a loop button an RTZ button. This window also tells you the record time remaining on whatever disk you selected in Settings.
Finally, there’s a Mixer Control window that you access via the View menu. This shows your record input level, master volume, and one channel strip for each track you’ve added to the track window. From here you can adjust the individual levels and pans for each track in your project, although the controls are static and not automatable.
The program does have some idiosyncrasies that must be learned in order to use it. For example, you may be surprised to find that tracks in MSS won’t play unless they’re “selected.” To select a track, you click in the label area on the left, anywhere other than on the Mute, Solo, or Record buttons. The track number turns from black to blue, and the track will then play. This takes a bit of getting used to, since other editors simply play tracks that aren’t muted, but that’s how it is.
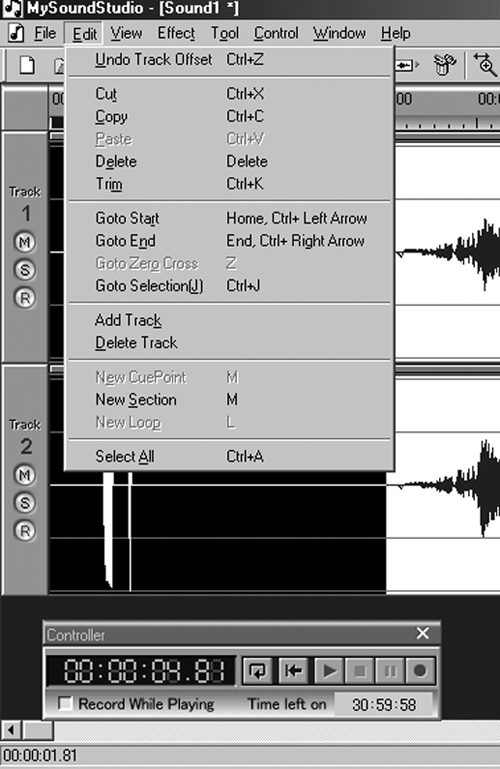
Tracks in MSS are always mono, so when you first start up the program you’ll need to add a second track from the Edit menu in order to work in stereo. You can group tracks and perform edits on all of them simultaneously using the Group ON button in the upper right. MSS allows only one group, and any track that is selected becomes part of the group. If you record in stereo, then the Group button is automatically enabled for those two tracks.

EDITING
Editing in MSS also has a couple of minor quirks. Clicking in a track sets a blinking cursor in that track at that position, but you can’t set the cursor in two adjacent tracks that aren’t grouped unless you press the Shift key first, then click in the second track. Clicking the ruler bar on the top causes a cursor to appear across all tracks. It’s not as confusing as it sounds, but it does take a bit of getting used to and it does require a few extra steps.
Slipping tracks against one another is also a little different. Rather than grabbing in the waveform itself, you grab the offset bar just above the waveform’s display and drag it instead. This will move either the single track or, if Group is enabled, all tracks in the Group.
Other editing operations in MSS work as you would expect, and the list of edit operations is complete enough. The program does lack a cut function that leaves empty space, but you can use Mute in the Effect menu to silence a selected region. Paste operates as an insert command, unless a region is selected prior to pasting, in which case the selected region is replaced. The Goto Zero Cross command works well to avoid generating clicks when you edit by reducing or extending both ends of a selected regions to the nearest zero crossing point. There’s also a one-level-deep Undo function, which is active until you Save the file.

You can zoom in horizontally and get right down to the sample level. At this magnification you’ll see individual samples as dots, and MSS lets you grab an individual sample and move it up or down. This is handy for performing microsurgery and eliminating clicks. You can also zoom vertically, but this simply makes the waveform displays taller or shorter so you can see more or fewer tracks at once. There’s no ability to increase the scale of the waveform within an individual track, which I find useful for hunting down low-level noises.
The program gives you keyboard shortcuts for most all common operations, and they really do speed up the work. The right mouse button is also well-supported, and brings up a context menu of functions that’s appropriate to wherever you’ve clicked. But as mentioned earlier, there is no scrub or reel-rocking function to help find edit points. Nor is there a fast-forward or rewind command, and in fact you can’t play audio backwards from the main window at all, although Reverse does exist as an effect.
You can drop an unlimited number of markers in your recording, which MSS calls Cue Points. They then appear in the Cue Point/Section/Loop List, and you can go directly to them by clicking on an entry. Similarly, you can highlight a region and define it as a Section, which will also appear in the List. List items can be sorted using the pop-up menu in the lower left of the window.
MSS edits directly to the hard disk, so every edit operation brings up a progress bar while the program writes the edit and undo file to disk and recalculates the waveform display. This can become tedious when you’re working on large regions, but for most smaller edits it’s not a particular bother. Remember, we’re talking about a $70 multitrack editor here...

